
Multisite 是 WordPress 內建的一個功能,可以簡單地搭建和管理多個 WordPress 站點,並且共享賬戶、外掛等一些資料。由於 BYR 想要使用 WordPress 建立媒體等站群,正好可以使用 Multisite 或者簡稱 MU,方便管理和搭建新站。
在開始之前,值得注意的是,經過試玩,WordPress Multisite 不太適合用來搭建區別很大的站點,而是適合一個媒體站羣,比如 Engadget 中文版和中國版。
(後面還有:WordPress 開啓 Multisite、域名綁定、功能限制、遷移正常站點到 Multisite 子站等)
開啓 Multisite
首先,需要一個完整(而且新)的 WordPress。在 wp-config.php 中加入:
/* Multisite */
define( 'WP_ALLOW_MULTISITE', true );
然後進入後臺,就可以在 Settings 選單中發現「網絡安裝」。選擇網絡安裝,可以看到有子域名和子目錄兩種方式。
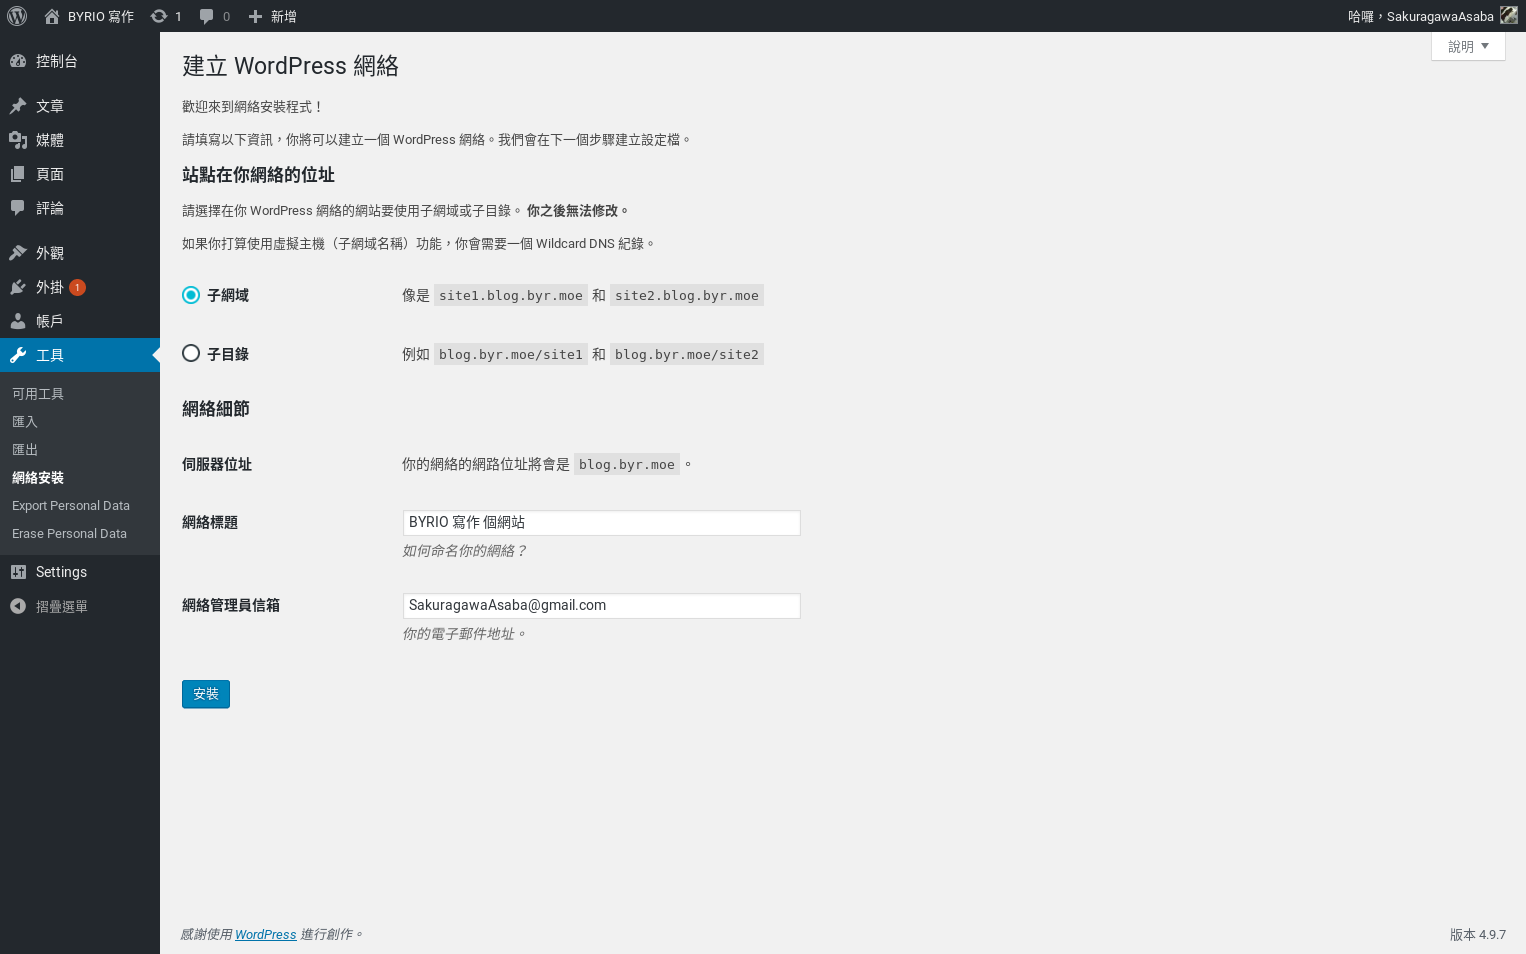
這裏因爲需求,就選擇子目錄的方式。緊接着 WordPress 會提醒做兩件事。首先,在 wp-config.php 中加入
define('MULTISITE', true);
define('SUBDOMAIN_INSTALL', false);
define('DOMAIN_CURRENT_SITE', '$site.example.com');
define('PATH_CURRENT_SITE', '/');
define('SITE_ID_CURRENT_SITE', 1);
define('BLOG_ID_CURRENT_SITE', 1);
然後針對子域名的方式,在 wp-config.php 同級的 .htaccess 中刪除原來的所有規則,並且加入:
RewriteEngine On
RewriteBase /
RewriteRule ^index\.php$ - [L]

# add a trailing slash to /wp-admin
RewriteRule ^([_0-9a-zA-Z-]+/)?wp-admin$ $1wp-admin/ [R=301,L]

RewriteCond %{REQUEST_FILENAME} -f [OR]
RewriteCond %{REQUEST_FILENAME} -d
RewriteRule ^ - [L]
RewriteRule ^([_0-9a-zA-Z-]+/)?(wp-(content|admin|includes).*) $2 [L]
RewriteRule ^([_0-9a-zA-Z-]+/)?(.*\.php)$ $2 [L]
RewriteRule . index.php [L]
切記刪除原先的所有規則。另外,如果使用子域名的方式,需要添加不同的 .htaccess 規則,可以參考官方 Codex 站點的 htaccess 頁。
設定好之後,按要求重新登入,就會發現後臺大變樣啦。
遷移已有站點
遷移已有的 WordPress,其實本來不是什麼大問題,WordPress 自己就能匯出大部分資料。另外,針對賬戶等額外的資料,也有很多的外掛都可以解決;然而如果加上「遷移到 MultiSite 子站」的要求,能用的外掛少了不說,基本都還需要付費。
萬幸的是,經過半天的嘗試,淺羽找到一個好用的開源工具 MU-Migration,可以輕鬆地完成遷移。首先,需要安裝好 WP-CLI:
curl -Ohttps://raw.githubusercontent.com/wp-cli/builds/gh-pages/phar/wp-cli.phar
chmod +x wp-cli.phar
sudo mv wp-cli.phar /usr/local/bin/wp
兩邊都安裝好工具:
php -d memory_limit=512M "$(which wp)" package install 10up/mu-migration然後在原站點執行匯出,可選一併匯出主題、上傳等:
wp mu-migration export all site.zip --plugins --themes --upload匯出的檔案名爲 site.zip,放到新的站點下執行匯入:
wp mu-migration import all site.zip --new_url=multisite.dev/site --blog_id=3注意這裏的 multisite.dev/site 是新的子站的全路徑,3 則應該換成子站的 ID。
這樣做完了之後,可以看到用戶、外掛的設定等都沒丟,全部遷移過來了。怎麼說呢,開源好過收費系列?除了 CLI 可能會嚇到人之外。
綁定到頂級域名
在「網路管理」- 「站點」中,設定子站點的 URL 爲完整的帶協議和 Trailing Slash 的域名即可。完成之後,只要把 DNS 解析改對,就可以直接訪問了。

發佈留言